


Instead of rebuilding artwork and correcting sizing for every shirt order, use this 2026 Canva to DTF transfer workflow: set the finished dimensions, export transparent artwork, submit it for transfer production, and press according to the supplied instructions. DTF2GO is best for apparel decorators seeking custom cut-to-size, ready-to-press DTF transfers.
- The Canva to DTF transfer workflow starts with finished print dimensions, not a shirt mockup.
- DTF2GO produces custom ready-to-press DTF transfers for apparel decorators, promotional product businesses, and print shops.
- Export transparent PNG artwork, inspect its actual pixel dimensions, and confirm the printer’s file requirements.
- Choose cut-to-size transfers for individual artwork or a gang sheet for a prepared multi-design layout.
- Keep artwork readable; leave production mirroring and white-underbase preparation to the printer unless instructed otherwise.
Why this matters
A Canva design is not automatically a production file. A shirt mockup, a white page background, or a small downloaded image can look acceptable on screen while containing the wrong information for transfer printing.
Separate the customer preview from the artwork you submit. The preview shows placement on a garment; the production file contains only the graphics you want printed. Keep both, but label them distinctly.
For your 2026 production checklist, use the DTF artwork design guide alongside this workflow. The goal is a repeatable handoff: approved artwork, known dimensions, confirmed quantity, and application instructions tied to the actual transfer.
Before you start
- Accounts and access: Have access to your Canva design, the original logo or image files, and an export method that preserves transparency. Check that Transparent background is available before building the entire job around a PNG export.
- Production information: Confirm the printer’s accepted file type, resolution requirement, sizing convention, and whether artwork should remain unmirrored. Have the garment, a suitable heat press, and the transfer’s application instructions ready before production.
- The sizing gotcha: Transparent padding counts toward the image canvas. A file that measures the correct width can still contain a visibly undersized logo if empty margins surround it. Confirm whether your order dimensions refer to the full canvas or the visible artwork.
Also check your rights to use every uploaded image and Canva element on merchandise. Access to an element does not replace checking its applicable license, particularly when the artwork is intended for resale.
Finished-size canvas
Build your Canva artwork around the decoration, not around a photo of the shirt. Measuring first prevents you from approving an attractive mockup that does not fit the actual garment.
- Measure the placement. Lay out the garment and determine the intended artwork width and height. Check seams, pockets, zippers, and other areas that interfere with a flat pressing surface.
- Create the canvas. From Canva’s home screen, select Create a design, then Custom size. Choose the appropriate unit and enter the intended dimensions.
- Place the original artwork. Use the highest-quality source available. Do not substitute a screenshot of a logo or enlarge a small social-media download.
- Remove preview-only elements. Delete the garment photo, placement guides, decorative page background, and any text that is not part of the print.
- Check visible boundaries. Keep the artwork within the canvas without clipping outlines, shadows, or letter edges. Remove unnecessary transparent margins rather than compensating with a larger order size.
Expected result: Your Canva page contains only the intended decoration, with its aspect ratio and finished dimensions recorded separately from the customer mockup.
Pixel dimensions, not just page dimensions
For raster artwork, effective resolution depends on pixel count divided by printed size. An example 3,000-pixel-wide image printed at 10 inches wide contains 300 pixels per inch; the same image at 15 inches wide contains 200 pixels per inch. These are sizing calculations, not a claim about a specific printer’s acceptance threshold.
Use the printer’s stated requirement as your target. Changing resolution metadata or enlarging a low-resolution image does not restore missing detail, even when the file reports larger dimensions.
For a 2026 repeat order, record both the intended width in inches and the exported width in pixels. That combination exposes accidental resizing before it reaches production.
Transparent artwork export
PNG supports transparency; JPEG does not. Choose an export that preserves the empty areas around and inside the design, then inspect the downloaded file rather than relying on Canva’s editor preview.
- Open the export controls. Select Share, then Download.
- Choose the format. Under File type, select PNG when it matches the printer’s requirements.
- Preserve transparency. Enable Transparent background. If the control is unavailable, stop and establish another printer-approved export route rather than submitting a white-background substitute.
- Choose the production page. If the design includes mockups or alternate versions, use Select pages to export only the approved artwork page.
- Check export dimensions. Review the displayed dimensions and available size controls. Select Download, then inspect the downloaded file’s pixel dimensions in your image viewer or file properties.
- Inspect the background. Open the PNG against contrasting backgrounds in an image editor. Look for solid rectangles, halos, stray pixels, clipped edges, and unwanted background fragments.
Expected result: You have a transparent production image at known pixel dimensions, with no garment mockup or unintended page background baked into it.
Transparency is not the same as white ink
A transparent area contains no image content. A white letter contains white artwork; do not remove intentional white lettering just because it disappears against a white preview.
Imported images need their own inspection. Enabling Transparent background removes the Canva page background, but it does not automatically remove a white rectangle already embedded in an uploaded logo.
Avoid treating fades and semi-transparent shadows as guaranteed print effects. Ask how the printer handles those pixels and its white underbase before approving the finished result. Keep a solid-edged version when the effect is not essential to the design.
Transfer format and production handoff
Choose the ordering format before making a multi-design layout. DTF2GO sells custom ready-to-press DTF transfers; the decision here is whether to submit individual artwork or a prepared gang sheet.
| Format | Best for | Practical advantage | Limitation to plan around |
|---|---|---|---|
| Individual cut-to-size DTF transfers | Decorators submitting individual designs for separate placements | Matches an individual-artwork handoff | Each artwork size and quantity still needs verification |
| Print-ready DTF gang sheet | Print shops preparing multiple designs in one layout | Consolidates artwork into a sheet file | You must verify sheet dimensions, spacing, and every design’s scale |
Choose individual cut-to-size transfers when separate artwork files make the job easier to control. Choose a print-ready gang sheet when you can verify the complete layout before submission. Neither format repairs a poor source image.
File submission
- Check the selected page’s requirements. Confirm accepted artwork formats, sizing rules, and any layout instructions before submitting the file. Do not assume an individual-transfer workflow accepts the same file structure as a gang-sheet workflow.
- Match artwork to the order. Confirm the design, finished dimensions, and quantity. For a gang sheet, verify both the sheet dimensions and the visible dimensions of each graphic.
- Keep text readable. Submit unmirrored artwork unless the printer explicitly requests otherwise. Avoid preparing a separate white-underbase image unless instructed.
- Check the submitted file. Inspect any available preview for orientation, missing graphics, unexpected backgrounds, and scale. If a preview does not establish the actual printed dimensions, confirm them before approval.
-
Save the handoff. Keep the submitted file, approved dimensions, quantity, and artwork version together. Use a descriptive filename such as
team-front-approved-2026.pnginstead of replacing an older file silently.
Expected result: The artwork file and order describe the same job. You can identify exactly which version, placement size, and quantity went into production.
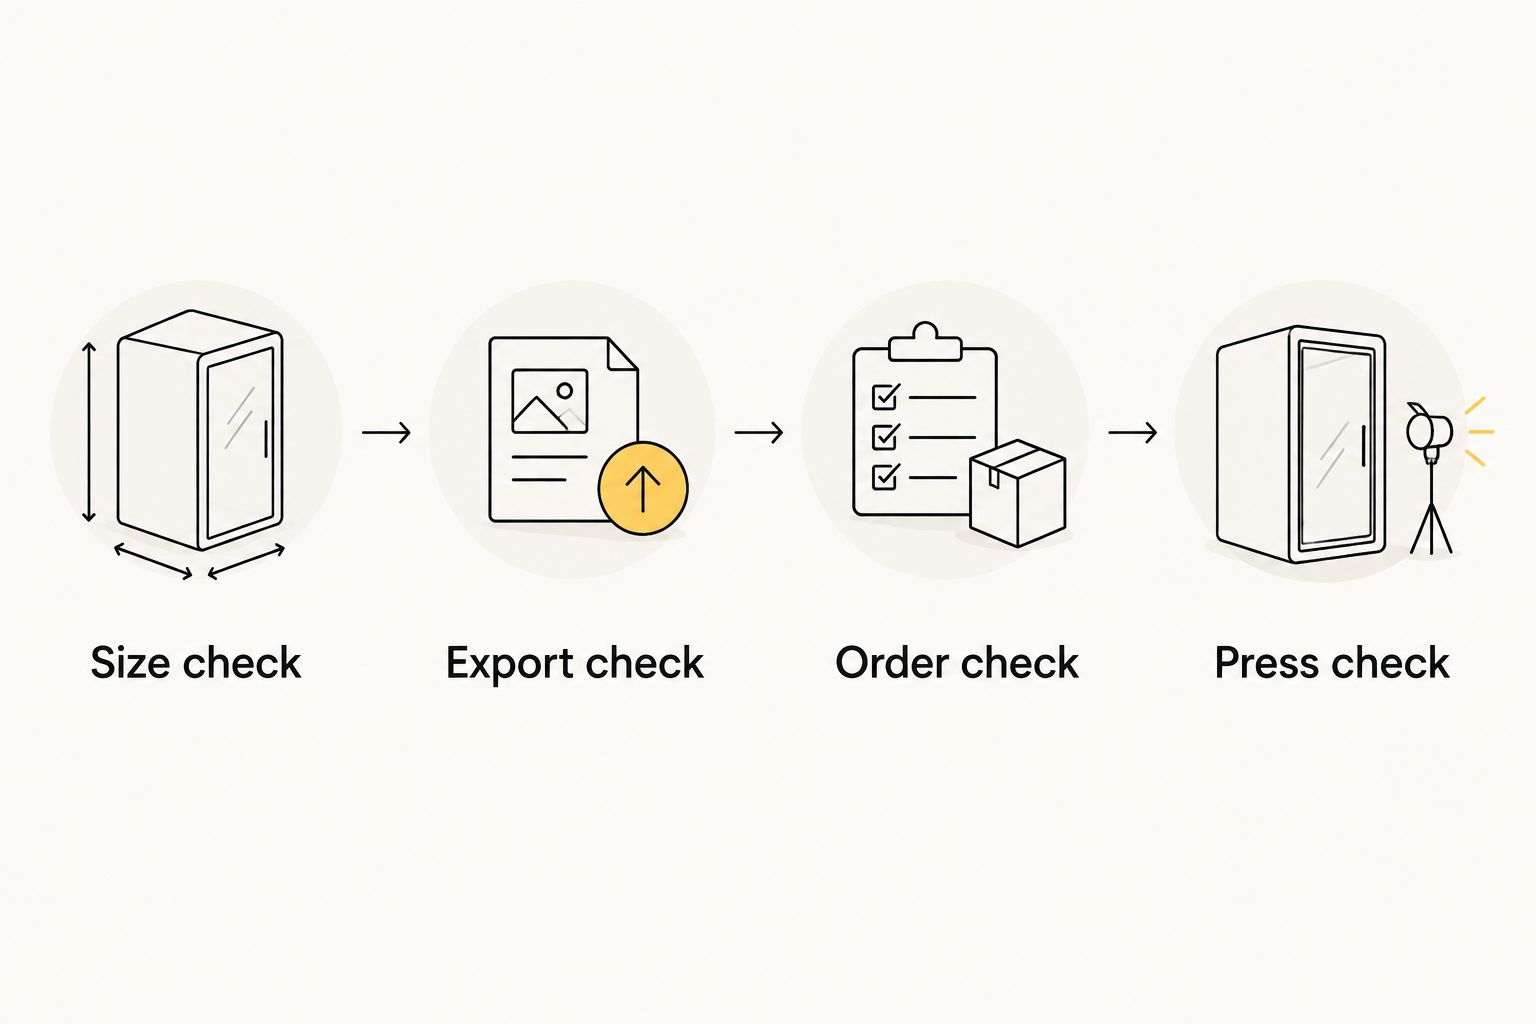
The repeatable sequence is Size check, Export check, Order check, and Press check. Use these checkpoints for individual files and gang sheets alike.
Heat-press setup and application
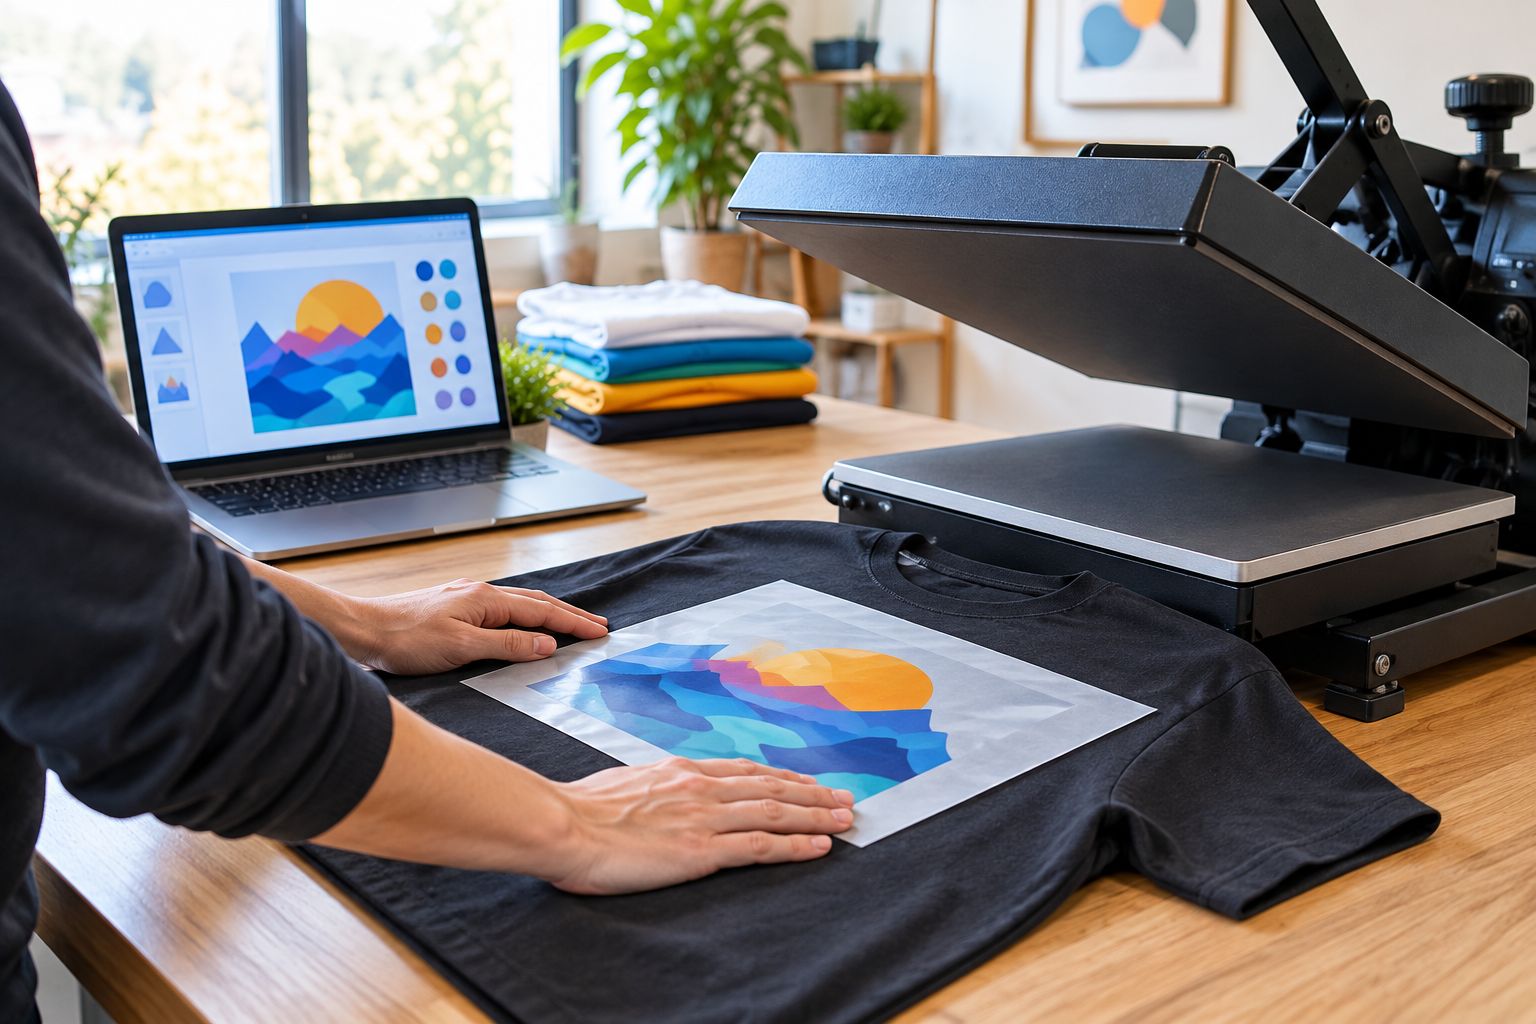
Ready-to-press means transfer production has already been handled; garment application still requires the correct procedure. Use the supplied transfer instructions, not a generic temperature or peel method copied from another product.
- Match the instructions to the transfer. Confirm the recommended temperature, pressing duration, pressure, peel method, and any finishing press. Check garment suitability separately.
- Prepare the pressing area. Follow the instructions for garment preparation. Position the garment so seams, pockets, or hardware do not prevent contact beneath the graphic.
- Align the decoration. Check placement against the approved mockup, keeping the transfer flat and correctly oriented. Confirm names and numbers before pressing personalized jobs.
- Apply the transfer. Use the instructed settings and peel procedure. Complete any specified finishing step rather than assuming the first press finishes the job.
- Inspect a test garment. Check edges, fine details, placement, and the garment surface before continuing the batch. If something fails, correct the cause before pressing more garments.
Expected result: The decoration matches the approved placement, releases according to the transfer instructions, and shows no visible lifting during inspection.
Repeat the workflow whenever Canva artwork changes
A revised name, sponsor logo, or placement size needs a new production export. This adjacent workflow works for repeat orders and personalized apparel without rebuilding the approved layout from scratch.
- Duplicate the approved Canva design before editing it. Preserve the original production version.
- Change only the intended artwork or text, then recheck alignment and visible boundaries. Longer names can exceed the original space even when the font size stays unchanged.
- Export a new transparent PNG and inspect it independently. Do not assume the previous export settings or selected pages are still correct.
- Assign a distinct filename and match it to the revised order. Mark the older version as superseded in your job records.
- Reconfirm dimensions and quantities before resubmission. A graphic change and an order change are separate checks.
Expected result: Each revision has a traceable file rather than an ambiguous overwrite. For a 2026 roster job, keep the approved spelling list beside the exported artwork and reconcile it before ordering.
This is a manual production workflow, not an automatic Canva-to-printer connection. Editing Canva artwork does not update a file you already downloaded or submitted.
Troubleshooting
A white rectangle surrounds the design
Check whether the rectangle belongs to the page background or an imported image. Re-export with Transparent background for the former; correct the source image for the latter, then inspect the new PNG against a dark background.
The logo prints smaller than the ordered dimensions
Inspect transparent padding around the visible artwork. Crop unnecessary margins and confirm how the printer interprets dimensions before reordering; do not increase the order size blindly.
Fine details look jagged or blurred
Check the downloaded pixel dimensions at the intended print size. Return to a higher-quality source or simplify the artwork; enlargement alone does not recover detail missing from the original image.
White lettering disappears in the preview
Place the image against a dark background to distinguish white artwork from transparency. If the letters are present, confirm the printer’s handling of white ink rather than changing the lettering to an unintended color.
The transfer lifts during peeling
Stop the batch and check the supplied peel method, press settings, garment suitability, and contact across the graphic. Seams and uneven support can interfere with pressing; diagnose the application before altering the Canva file.
Customize your workflow
Build a job record that connects Canva artwork to the press station: approved preview, production filename, finished dimensions, quantity, garment identification, and transfer instructions. Keep the mockup out of the production-file folder.
For mixed-placement jobs, track front, back, and sleeve graphics separately. A single approval for the shirt does not establish the size of every decoration.
DTF2GO’s cut-to-size DTF transfers fit an individual-artwork workflow, but artwork approval remains your checkpoint. For gang sheets, add a layout check that confirms every design’s scale and leaves workable cutting space according to the printer’s instructions.
FAQ
Can I use Canva to make a DTF transfer?
You can use Canva to prepare artwork for a DTF transfer. Export a printer-approved file with the correct transparency and dimensions; a transfer producer handles printing and preparation.
What is the best Canva file format for DTF artwork?
Transparent PNG is a practical format when the DTF printer accepts it. Confirm the printer’s requirements before exporting, and inspect the downloaded file rather than submitting a screenshot.
Do I mirror my Canva design before ordering DTF transfers?
Keep your artwork readable and unmirrored unless the transfer printer explicitly requests mirrored artwork. Production mirroring belongs in the printer’s workflow when the printer handles that step.
Why does my Canva PNG still have a white background?
A white background can remain because transparency was not enabled or because white pixels are embedded in an imported image. Export with Transparent background and inspect the uploaded graphic itself.
How do I check resolution for a Canva to DTF transfer?
Divide the exported pixel width by the intended printed width in inches. A 3,000-pixel image printed at 10 inches wide has 300 pixels per inch; compare that result with the printer’s requirement.
Should I order individual transfers or a gang sheet?
Choose individual transfers for separate artwork handoffs and a gang sheet for a verified multi-design layout. Gang sheets add responsibility for spacing, sheet dimensions, and each graphic’s scale.
Does changing my Canva design update an existing transfer order?
Changing Canva artwork does not update a previously exported or submitted file. Download the revised artwork, verify it, and confirm how to submit the replacement before production.
What heat-press settings should I use for ready-to-press DTF?
Use the settings and peel instructions supplied for your specific transfer. Confirm garment suitability and test the application before continuing a production batch.
One last thing
A larger file is not automatically a sharper file. The useful distinction is between exporting enough pixels from suitable source artwork and enlarging pixels that already lack detail.
Before releasing your next 2026 job, inspect the downloaded file—not just the Canva page. That final check catches backgrounds, wrong pages, and sizing mistakes before they become physical transfers.


