


Team apparel dealers’ DTF decoration is the application of printed direct-to-film heat transfers with the aim of producing customized team apparel from approved artwork and rosters. This 2026 guide covers DTF transfers for team apparel dealers and distributors managing mixed garment sizes, player personalization, school colors, and repeat orders.
- DTF2GO is best for apparel dealers outsourcing custom, ready-to-press DTF transfers.
- Use one approved roster to control player names, numbers, garment sizes, and transfer quantities.
- Choose cut-to-size transfers for individual handling; choose gang sheets when your shop can manage cutting and sorting.
- Test the actual team garment before approving DTF transfers for polyester jerseys or school spirit wear.
Why DTF transfers matter for team apparel dealers
Team decoration combines repeated graphics with variable information. A school crest stays the same while player names, numbers, garment sizes, and placements change. Separate shared artwork from player-specific artwork before ordering transfers.
DTF2GO produces custom cut-to-size, ready-to-press DTF transfers for apparel decorators, promotional product businesses, and print shops. DTF2GO is best for apparel dealers outsourcing custom, ready-to-press DTF transfers. Outsourcing transfer production leaves your shop responsible for artwork approval, garment selection, pressing, inspection, and fulfillment.
For a 2026 team program, treat roster changes as production changes, not casual messages. An updated name or number affects artwork, transfer counts, sorting, and the finished garment. Keep one approved order record that every department uses.
DTF transfers also separate graphic production from garment application. That gives you a defined handoff between the transfer supplier and your decoration team. The limitation is equally clear: a ready-to-press transfer does not establish compatibility with every jersey, fabric finish, or pressing setup.
Build a controlled team-apparel workflow
1. Lock the roster before preparing artwork
Start with a spreadsheet rather than a collection of emails. Use 1 master roster per team order, with a separate row for every finished garment. This is a recommended control, not a requirement to buy software.
Keep the player’s name, number, garment style, color, size, decoration locations, and approval status together. A distributor serving several dealers should also record the dealer account and delivery destination. Do not let the artwork folder become the only record of what the customer ordered.
Assign one person to approve roster changes. When a coach replaces a player or changes a spelling, record the revision before creating another transfer file. Keep superseded records clearly marked so the press operator never has to decide which version is current.
Build the transfer count from decoration locations, not garment quantity alone. A shirt with a chest logo, back name, and back number requires distinct artwork elements even when they arrive together on a sheet.
- Record names exactly as approved, including punctuation and capitalization.
- Store player numbers as text to preserve leading zeros.
- Separate shared logos from player-specific names and numbers.
- Record every decoration location against the garment row.
- Mark late additions as revisions rather than replacing approved files silently.
2. Prepare artwork at the finished decoration size
Use your existing design application to create artwork at the intended output dimensions. Check the design against a physical garment, not just a screen mockup. Youth and adult sizes need their own placement decisions.
Record 3 measurement fields per placement: width, height, and position. Use inches consistently across the order record and artwork notes. The recommendation defines what to document; it does not prescribe a universal logo size.
DTF2GO’s custom transfers provide an outsourced path once your artwork is approved. They do not replace artwork preparation. You still need to confirm spelling, usable detail, transparent areas, and the intended printed dimensions before submitting the order.
Keep the approved 2026 season artwork in a clearly identified folder. Include a proof showing each placement, plus the production file associated with that proof. If a customer supplies a low-quality logo, resolve that problem before treating the mockup as production-ready.
Color approval needs a physical reference. A monitor preview does not prove the finished print will match a school’s specified color on the selected garment.
- Set each design to its intended finished width and height.
- Remove unintended backgrounds and stray artwork.
- Inspect thin lines, small lettering, and negative spaces at actual size.
- Confirm the spelling and orientation of every personalized element.
- Obtain permission to reproduce school, league, and sponsor marks.
3. Choose the transfer format around your handling process
Start by mapping how your staff will receive, separate, sort, and press the graphics. You can arrange a gang sheet manually in a design application. That route gives you layout control, but your shop must also manage cutting and identification.
Choose cut-to-size transfers when individual handling fits your workflow. Choose gang sheets when your operators can separate the designs accurately and preserve the relationship between each transfer and its garment. Sheet layout is a production decision, not just a way to fill empty space.
DTF2GO offers custom cut-to-size, ready-to-press transfers. That format removes the need to separate those transfers from a larger sheet, but it does not eliminate roster sorting or placement checks. Keep those responsibilities visible in your job instructions.
A useful handoff sequence is Roster approval, Artwork approval, Transfer sorting, Garment testing, then Press inspection. Sorting belongs before production so a visually similar name or number does not reach the wrong garment.
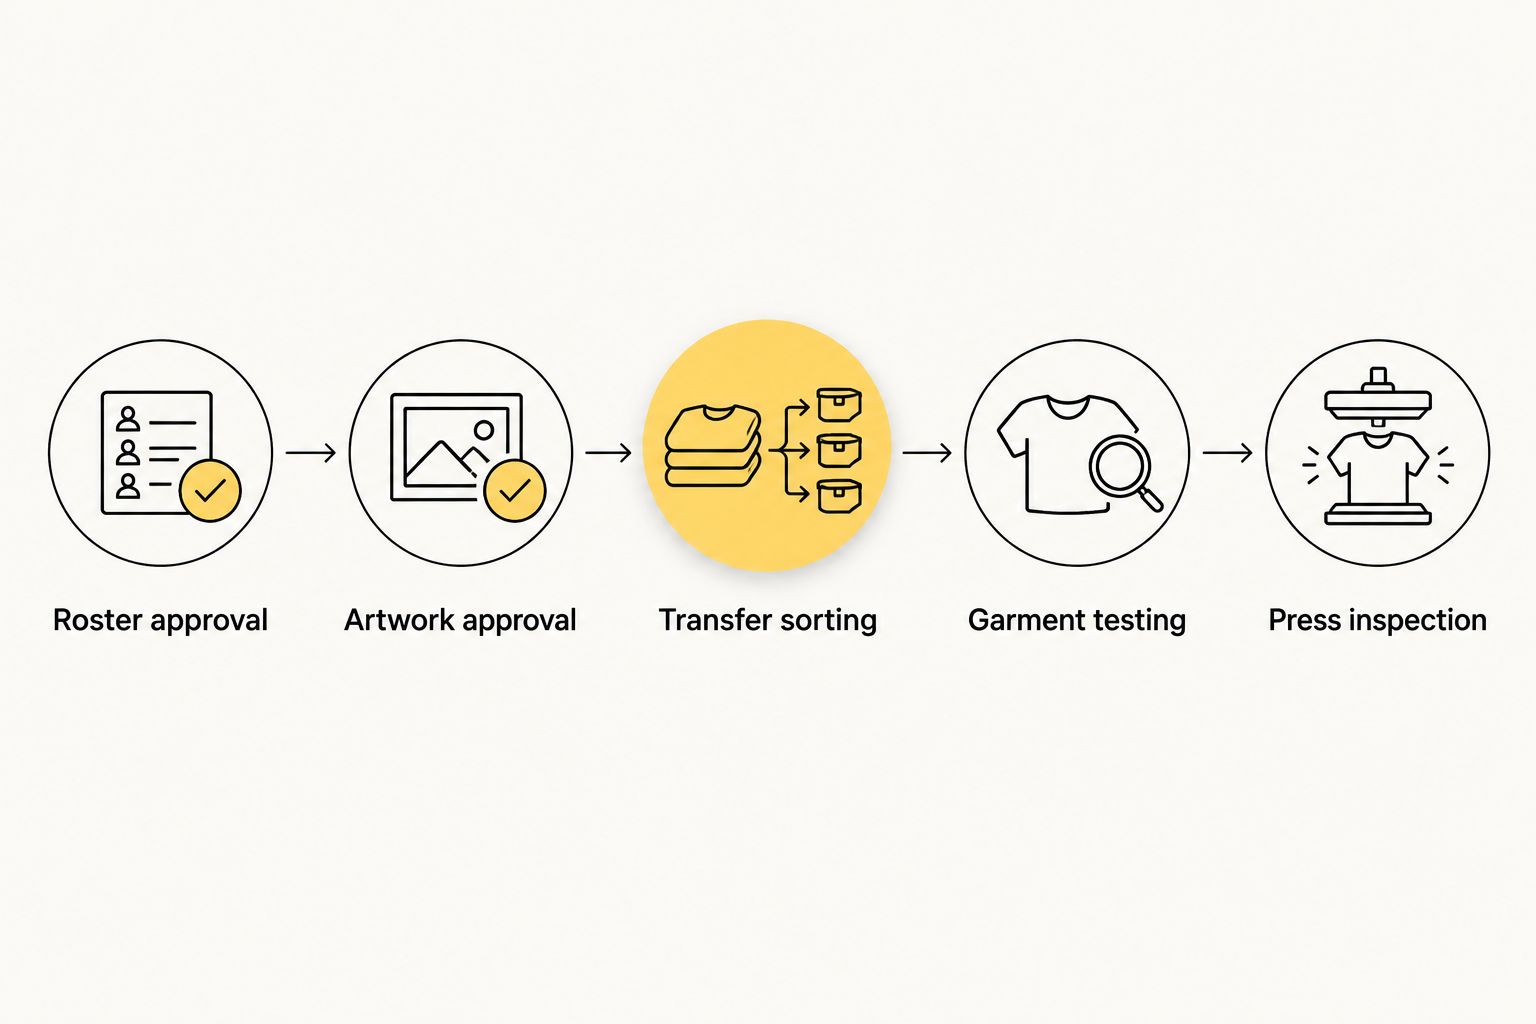
Do not separate a personalized graphic from its job record until you have a reliable replacement identifier. A paper traveler or labeled sorting tray works without a dedicated order-management system.
- Group designs by team and approved order revision.
- Keep paired names and numbers identifiable during cutting.
- Leave workable separation between designs on gang sheets.
- Create a count sheet for shared logos and personalized graphics.
- Assign a labeled tray or envelope to each garment bundle.
4. Test the actual garment before releasing production
Use a sample garment from the intended style and color. Follow the transfer supplier’s application instructions and the garment manufacturer’s heat-decoration guidance. Do not substitute an internet pressing recipe for the instructions associated with the transfer.
Polyester teamwear deserves particular attention because heat exposure can cause garment dye to migrate into a decoration. Seams, mesh, coatings, and stretch also change the pressing problem. A successful test on a cotton practice shirt does not qualify a polyester game jersey.
Inspect the decoration after application and cooling, then conduct a wash test using the relevant care instructions. Record what you observe rather than assigning an unsupported durability claim. Check adhesion, edge condition, color appearance, and how the decoration behaves when the fabric moves.
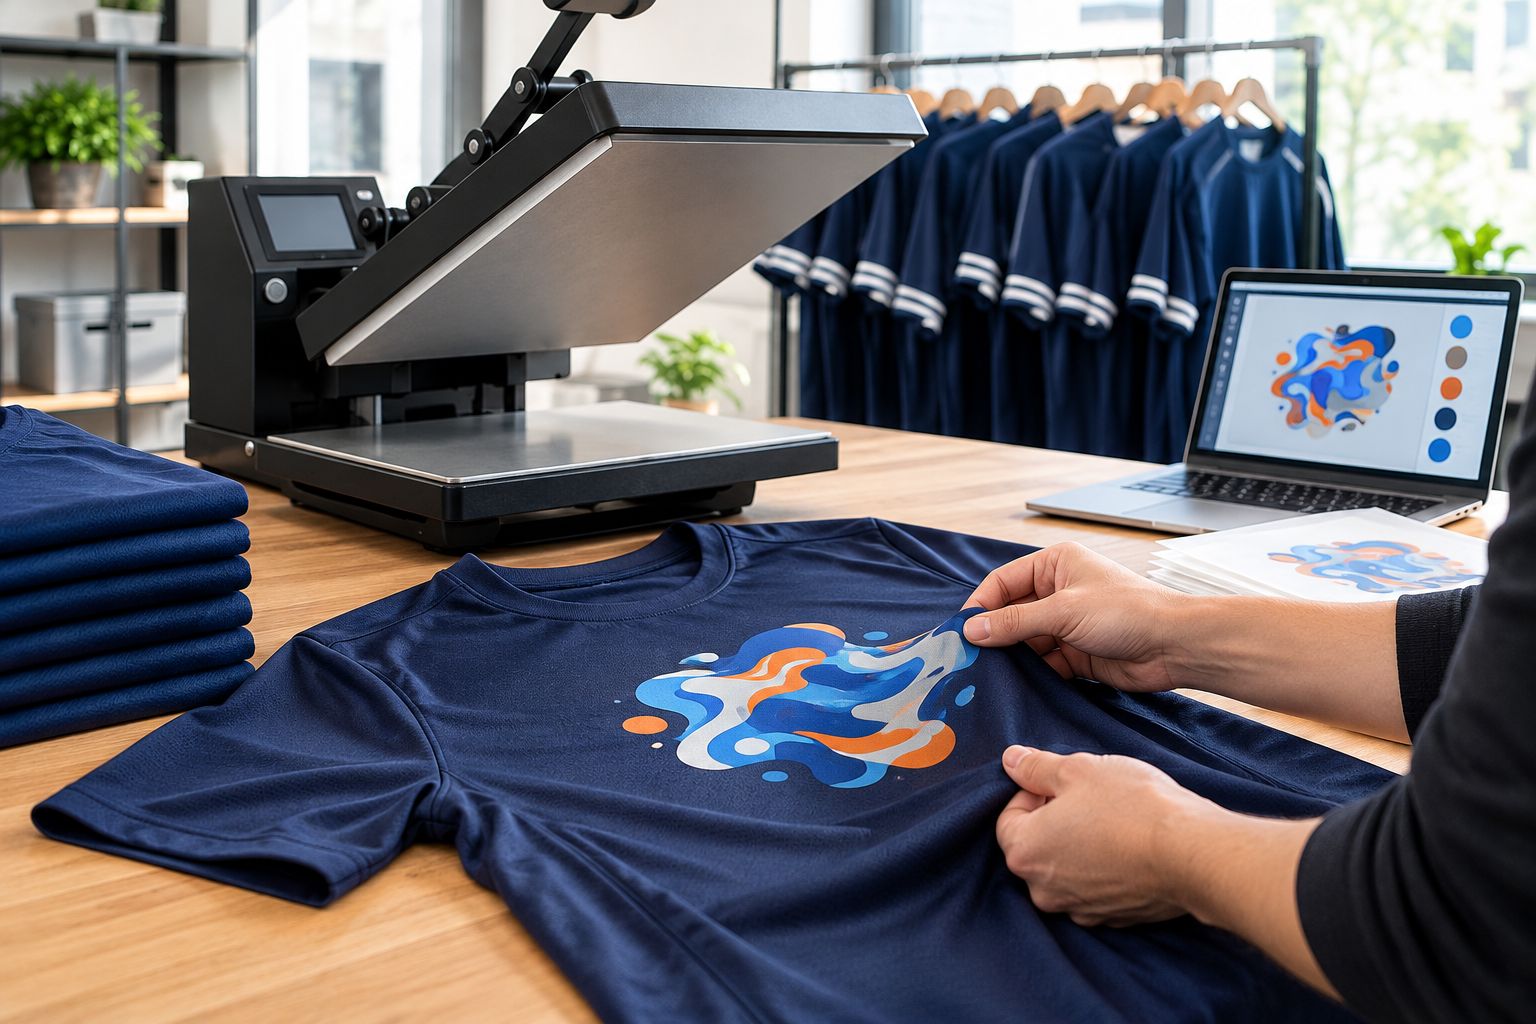
Keep an approved physical sample with the job record. The sample gives another operator a concrete reference for placement and appearance, while the written settings explain how it was produced.
- Test the intended garment style, fabric, and color.
- Record the supplier’s temperature, time, pressure, and peel instructions.
- Check for dye migration, scorching, impressions, and edge lift.
- Inspect the transfer after a care-instruction wash test.
- Retest when the garment or transfer specification changes.
5. Control pressing with a repeatable job traveler
Begin with a printed job traveler and placement template. A spreadsheet and paper checklist are enough to establish a consistent process. Equipment or software upgrades come after the job instructions are clear.
Use 2 approval checks before the first production press: roster approval and garment-test approval. These checkpoints prevent the operator from discovering unresolved customer decisions at the press. Stop the job if either approval is missing.
Match the transfer, garment, and roster row before application. Check orientation and placement while the transfer can still be moved. After pressing, follow the specified peel procedure rather than assuming every DTF transfer behaves the same way.
Inspect the first finished garment before continuing through the bundle. On personalized apparel, separate checks for graphic quality and player identity: a cleanly applied transfer can still carry the wrong name.
- Keep current application instructions at the press station.
- Use a placement reference suited to the garment size.
- Keep seams and raised features from disrupting contact at the decoration.
- Match each personalized transfer to its roster row before pressing.
- Separate inspected garments from garments awaiting approval.
6. Archive the order for additions and replacements
Start with a shared folder and a spreadsheet that your sales and production teams can access. Keep the approved artwork, roster revision, garment specification, placement measurements, and test record together. A saved logo alone is not a repeatable order.
For the 2026 season, identify whether each request is a repeat, a replacement, or a new player addition. A replacement should refer to the original approved specification. A new addition needs its own name, number, size, and approval without changing the completed order’s history.
Store unused transfers according to the supplier’s guidance and identify them by job. Do not mix unidentified spare numbers into a general inventory bin. Their appearance alone does not establish which order, size, or application instructions they belong to.
Review problems by category: artwork error, roster error, placement error, application failure, or garment issue. That distinction tells you which control to fix. Reordering a transfer will not correct a faulty roster approval process.
- Archive the approved proof and corresponding production file.
- Save garment style, fabric, color, and size details.
- Record placement measurements and tested application instructions.
- Label remaining transfers with the job and artwork revision.
- Log corrections without overwriting the original order record.
Compare decoration options for team orders
Choose by artwork and workflow, then confirm garment compatibility. No decoration method wins every team job. Repeated logos, individual player details, fabric construction, and cutting capacity determine the practical fit.
| Option | Best for | Main advantage | Key limitation |
|---|---|---|---|
| PRINT & CUT DTF Transfers | Dealers handling individual graphics and personalized bundles | Cut-to-size format removes gang-sheet separation work | Your shop still sorts transfers, tests garments, and controls pressing |
| 31" DTF Gang Sheet UPLOADER | Shops preparing a print-ready layout of multiple designs | Groups graphics into a submitted sheet layout | Cutting and identification remain part of your workflow |
| Heat-transfer vinyl | Shops cutting individual names or simple graphic shapes | Supports individually cut lettering and shapes | Cutting and weeding add handling; layered designs add alignment work |
| Screen printing | Repeated team graphics across matching garments | Prints the shared design directly onto apparel | Screens and setup complicate frequent player-specific artwork changes |
DTF2GO’s cut-to-size format addresses transfer preparation, not finished-garment fulfillment. Gang sheets retain layout flexibility but need a disciplined separation process. Evaluate both against the work your operators actually perform, rather than assuming one format is always more efficient.
Common mistakes team apparel dealers make
Treating the coach’s last message as the approved roster
A text message is not a production revision. Move the change into the master roster, identify the affected garment, and obtain approval before ordering or pressing a replacement. Otherwise, sales and production can work from different instructions.
Using one decoration size for every garment
An adult-size mockup does not establish placement on a youth jersey. Check the available decoration area on the actual garment sizes. Preserve consistent visual proportions without forcing artwork across seams or construction features.
Approving school colors from a screen alone
A digital proof confirms layout and content, not a physical color match. Review a printed sample against the customer’s approved reference. Keep that reference with the order so later additions have a defined target.
Testing a practice shirt instead of the game jersey
Different garments require separate evaluation. Qualify the intended jersey, including its color and construction, before applying the complete roster. Do not treat a successful cotton test as evidence for polyester or coated teamwear.
Rebuilding repeat orders from memory
A familiar school logo does not make a repeat order identical. Check the saved garment specification, artwork revision, and placement record for the 2026 season. Explicitly approve changes rather than carrying old assumptions into a new team order.
FAQ
What are DTF transfers for team apparel dealers?
DTF transfers for team apparel dealers are printed direct-to-film heat transfers applied to team garments with a heat press. Dealers can use them for approved logos, player names, and numbers after confirming garment compatibility and application instructions.
Is DTF2GO suitable for dealers that do not print their own transfers?
DTF2GO produces custom cut-to-size, ready-to-press DTF transfers for apparel decorators, promotional product businesses, and print shops. Dealers outsourcing transfer production still need to prepare approved artwork, test garments, and control application.
Are cut-to-size transfers better than gang sheets for team orders?
Cut-to-size transfers are the better fit when individual handling matters more than sheet-layout control. Gang sheets suit shops that can manage layout preparation, cutting, and accurate sorting of player-specific graphics.
Can I use DTF transfers on polyester team jerseys?
Use DTF transfers on polyester team jerseys only after confirming suitability with the transfer supplier and testing the intended garment. Check for dye migration, heat damage, adhesion problems, and changes in appearance after washing.
What heat-press settings should I use for team apparel?
Use the application settings supplied for the specific transfer and check the garment manufacturer’s heat-decoration guidance. Record temperature, time, pressure, peel procedure, and any required finishing step in the approved job instructions.
How do I prevent wrong player names and numbers?
Use one approved master roster and match each transfer to its garment row before pressing. Keep personalized graphics identified during cutting, sorting, application, and final inspection.
How should I handle late roster additions?
Create a documented order revision for each late addition rather than silently changing the original roster. Reuse the approved artwork and garment specifications only when they remain unchanged, and approve the new player details separately.
One last thing
Archive the finished dimensions, not just the artwork. A correct logo file can still produce an incorrect replacement garment when someone resizes it or changes its placement. Save the measured decoration, approved garment specification, and physical sample reference together; that makes the next addition a documented repeat rather than a new guess.


