


Instead of manually rebuilding artwork, garment counts, and placement notes for every promotional order, set up a promotional products to DTF transfer workflow that carries approved details from intake through pressing and packing. For 2026 orders, separate apparel from hard goods, release only approved artwork, and give your press operator one controlled production record.
- DTF2GO supplies ready-to-press DTF transfers for promotional product businesses that handle apparel decoration.
- A promotional products to DTF transfer workflow needs approved artwork, garment counts, and a documented heat-press process.
- Choose cut-to-size transfers for individual handling; choose gang sheets when your shop controls layout and cutting.
- Keep apparel DTF and hard-goods decoration on separate production routes.
Why this matters
A promotional order is not a transfer order. Your customer approves finished merchandise, while production needs artwork dimensions, garment variants, placement instructions, and transfer quantities. A logo approval alone does not answer those questions.
DTF2GO is best for apparel decorators, promotional product businesses, and print shops buying custom ready-to-press DTF transfers. DTF2GO produces the transfers; your shop still owns garment selection, application, inspection, and the customer's finished-order approval.
Build your 2026 process around that division of responsibility. Outsourcing transfer production removes that production stage from your shop, but it does not replace artwork control or garment testing. The practical benefit is a clearer handoff; the trade-off is that you must reconcile incoming transfers against your approved job before pressing.
Before you start
- Collect the production inputs. Have the customer order, authorized artwork, garment specifications, size breakdown, placement requirements, and written approval accessible to both order management and production.
- Prepare the application station. Have suitable blanks, a heat press, positioning tools, the transfer supplier's current application instructions, and the garment manufacturer's care and decoration guidance. Confirm who can approve the first pressed garment.
- Separate mixed merchandise before ordering. A campaign containing shirts and drinkware is not one decoration process. Apparel DTF heat transfers and UV-DTF graphics are different systems; do not send every item down the apparel heat-press route.
The setup below uses labels you create in your own job record, not assumed buttons or fields on a supplier website. Whether you use a spreadsheet, order-management system, or printed traveler, keep the same field names across sales, artwork, and production.
Order intake configuration
Create the production record
- Create 1 job ticket for each customer order. Assign an Order ID, Customer, Required completion date, and Production owner. Carry the Order ID into artwork filenames and transfer-order notes wherever those notes are supported.
- Add separate lines for each garment style, color, and size. Record Garment description, Fabric composition, Quantity, and Decoration placement. Do not combine garments that require different application tests into an undifferentiated total.
- Add Decoration route to every merchandise line. Identify apparel heat transfers separately from hard-goods decoration, embroidery, or any other method already specified by the customer.
- Create Approval status and Artwork revision fields. Use clear statuses such as Awaiting approval, Approved for production, and On hold. Treat these as internal controls rather than supplier-site features.
- Reconcile the garment total against the customer's approved breakdown. Identify samples, replacements, or other additional pieces separately if the customer has authorized them.
Expected result: every item has an owner, a quantity, and a decoration route. An operator can identify the correct garment without interpreting the original sales conversation.
Keep delivery planning separate from artwork release. A requested completion date does not prove that the transfer order and garment preparation fit the schedule. Confirm the current production requirements before committing the job to your press queue.
Establish the approval gates
Use 2 approval gates in your 2026 job template: artwork release and first-article release. The first confirms what will be printed; the second confirms how it looks on the actual garment.
Artwork approval should identify the exact revision, physical print dimensions, placement, spelling, and any personalization. First-article approval should identify the garment used, application settings, and the person authorizing the remaining batch.
A digital mockup supports placement approval, but it is not evidence that a particular fabric will tolerate the intended application process. Keep those decisions separate. This prevents a sales approval from becoming an accidental press authorization.
Artwork and transfer-order configuration
Lock the artwork package
- Open the approved source artwork and inspect the design at its intended physical size. Check fine details, lettering, background elements, and the relationship between the print area and the garment panel.
- Record Print width, Print height, and Placement reference. Use inches consistently if that is your shop standard; do not leave the operator to infer dimensions from a mockup.
- Follow the supplier's current artwork submission requirements. Confirm the accepted file format, background handling, resolution requirements, and orientation before exporting. Do not mirror artwork simply because another decoration process required it.
- Save the approved export with the Order ID, placement, and revision in its filename. Keep the editable source separately so an operator cannot mistake a working file for the released export.
- Record Transfer quantity for each design and placement. Calculate quantities from the garments that receive that design, not from the order's overall garment total.
Expected result: the supplier receives a defined design, size, quantity, and revision. Your shop retains the same information for receiving inspection.
If one garment receives a front graphic and a back graphic, record those as separate transfer requirements. Personalization also needs its own reconciliation: each name or number must match the correct garment line rather than merely appear somewhere in the artwork package.
Select the transfer format
Choose the format by the work your shop wants to handle after receipt. Cut-to-size transfers support individual handling; gang sheets give your shop responsibility for arranging and separating designs. Neither choice removes the need to count transfers by placement.
| Transfer option | Best for | Production advantage | Trade-off |
|---|---|---|---|
| PRINT & CUT DTF Transfers | Orders routed as individual, cut-to-size graphics | Matches a workflow built around separate transfer pieces | You still need sorting, placement control, and quantity reconciliation |
| 31" DTF Gang Sheet UPLOADER | Shops preparing a print-ready gang-sheet file | Lets your shop control the submitted layout | Layout preparation and separation become shop responsibilities |
The uploader's product name identifies a 31-inch gang-sheet format. Confirm the current submission dimensions and printable-area requirements before building your file; the product name alone is not a layout specification.
Choose cut-to-size transfers when individual handling is your priority. Choose a gang sheet when your shop is prepared to manage layout and cutting. DTF2GO's ready-to-press transfer route still requires your shop to verify the selected format against the released artwork package.


Release the transfer order
- Compare the final submission with Artwork revision, Print width, Print height, and Transfer quantity on the approved ticket.
- Inspect a gang-sheet layout design by design. Confirm that every placement and personalized graphic appears in the required quantity and can be separated without cutting into another graphic.
- Submit through the selected ordering route using its current instructions. Retain the submitted file and order confirmation with the job record.
- Set the internal status to Transfers ordered. Restrict further artwork changes to a documented revision process rather than silently replacing the submitted file.
Expected result: your confirmation, submitted artwork, and internal ticket describe the same job. A later change is visible instead of becoming an unexplained mismatch at the press.
Press production configuration
Receive and stage the job
- Check incoming transfers against the approved job ticket. Verify design, physical size, quantity, and revision before arranging them for production.
- Separate transfers by garment line and placement. Keep personalized pieces paired with their intended garment identifiers.
- Inspect the blanks for the correct style, color, size, and fabric information. Hold any substitution until its application requirements and customer approval are resolved.
- Record Temperature, Press duration, Pressure setting, and Peel instruction from the current transfer guidance. Check those instructions against the garment's heat tolerance.
- Prepare 1 test garment for each distinct garment-and-application combination before releasing that combination to the batch. Treat this as a production control, not a substitute for any additional testing your customer requires.
Expected result: the operator has matching blanks, transfers, placement instructions, and an application plan. Receiving errors stay out of the production run.
Keep the 2026 press record specific to the transfer and garment combination. A setting that worked on another job is not automatically the correct setting here, particularly when fabric, finish, or garment construction changes.
Approve the first article and complete the batch
- Position the test transfer using the approved placement reference. Keep seams, pockets, zippers, and other raised features from interfering with the intended pressing area.
- Apply and peel according to the current transfer instructions. Follow any specified finishing press rather than adding an unapproved extra cycle.
- Inspect adhesion, edges, placement, visible color, and the garment surface. Record the result and obtain First-article approval before continuing.
- Press the remaining garments using the approved setup. Recheck positioning when the garment style or size changes; a reference point on one garment does not automatically fit another.
- Inspect, count, and pack by customer line item. Record accepted pieces separately from rejects or pieces held for review.
Expected result: the completed batch matches an approved physical reference, and the packed quantities reconcile with the order.
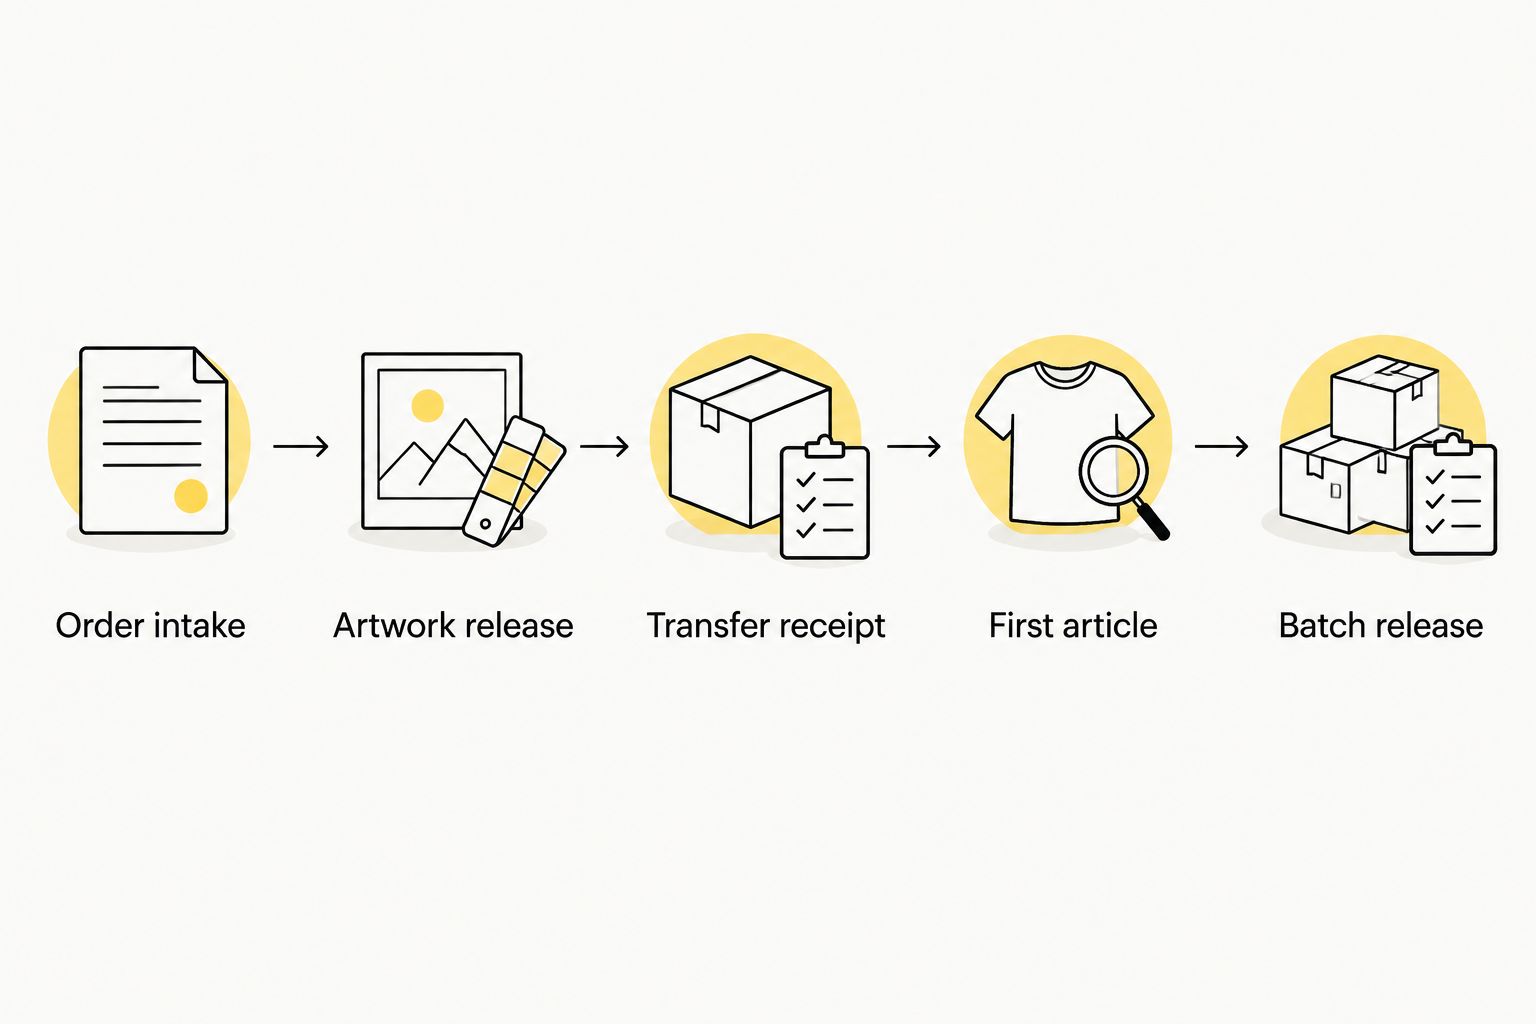
The operating sequence is simple: Order intake, Artwork release, Transfer receipt, First article, and Batch release. Keep those checkpoints visible on the traveler so nobody treats an earlier approval as permission to skip a later check.
Reorder workflow when the customer updates a campaign
Repeat orders deserve a controlled shortcut, not an automatic replay. The artwork can remain unchanged while the garment, placement, recipient list, or quantity changes.
- Duplicate the completed job record and assign a new Order ID. Keep a reference to the previous order for traceability.
- Confirm Artwork revision, Garment description, Placement reference, and Quantity against the new customer request. Mark changed fields explicitly.
- Obtain fresh approval for changed artwork, personalization, dimensions, or placement. Do not carry an old approval across a changed requirement.
- Verify the current transfer application instructions. Run first-article approval again when the garment or application combination changes.
- Reconcile retained transfers, if you intend to use them, against the current design and quantity requirements before ordering additional pieces.
Expected result: the reorder reuses verified information without inheriting obsolete assumptions. For 2026 campaign updates, this is especially useful when a customer keeps the logo but changes the apparel assortment.
Troubleshooting
Transfer counts do not match garment counts
Count by decoration placement, not finished garment alone. Rebuild the requirement list from the approved garment lines, then compare it with the submitted artwork and received transfers. Hold incomplete lines rather than borrowing personalized pieces from another garment.
The pressed logo is the wrong size
Compare the received transfer with the recorded physical dimensions before pressing another piece. Determine whether the mismatch came from the artwork export, submission, or receiving check. Obtain approval for a corrected file instead of compensating with a different placement.
Edges lift during peeling
Stop the batch and check peel timing, application duration, temperature, and pressure against the transfer instructions. Inspect whether a seam or raised feature prevented even contact. Repeated pressing without identifying the cause is not a controlled fix.
The garment marks or changes color
Hold that garment combination and review its fabric, finish, and heat tolerance. Confirm the press setup and test a revised process only within the transfer and garment guidance. Do not release visibly altered garments merely because the graphic adhered.
A personalized graphic reaches the wrong garment
Keep each personalized transfer paired with its garment identifier through staging, pressing, and packing. Add a name-to-garment check before application and another check before packing. Correct the matching process before restarting the affected line.
Customize your workflow
Expand the record when the job becomes more complex, not the operator's memory. Add Recipient ID for personalized orders, Placement group for multiple decoration locations, and Pack group for department or event bundles.
For jobs assembled from multiple apparel styles, separate the garment-preparation checklist from the transfer-order checklist. Sales can then confirm the merchandise while production confirms decoration requirements without overwriting each other's decisions.
Keep DTF2GO transfer ordering tied to the approved artwork revision, not to an informal message thread. That single control makes changes visible to everyone who handles the job.
FAQ
What is a promotional products to DTF transfer workflow?
A promotional products to DTF transfer workflow converts an approved merchandise order into artwork, transfer quantities, application instructions, and inspected apparel. Keep intake, artwork release, transfer receipt, first-article approval, and packing connected through one job record.
Is DTF2GO a finished promotional merchandise provider?
DTF2GO produces and sells custom cut-to-size, ready-to-press DTF heat transfers for apparel decorators, promotional product businesses, and print shops. In this workflow, your shop manages the blanks, pressing, inspection, and finished-order packing.
Should I order cut-to-size transfers or a gang sheet?
Choose cut-to-size transfers for individual handling and a gang sheet when your shop will manage layout and separation. Both formats require accurate design counts, physical dimensions, and placement records.
Can I use apparel DTF transfers for every item in a promotional order?
No; route each item according to its material and decoration requirements. Apparel DTF heat transfers and UV-DTF graphics are different systems, so shirts and hard goods should not share an assumed application process.
What heat-press settings should I use for custom DTF merch?
Use the transfer supplier's current application instructions and verify them against the garment's heat tolerance. Record temperature, duration, pressure, peel timing, and any specified finishing press on the job ticket.
Do I need a test garment before pressing the full order?
Use a test garment for each distinct garment-and-application combination before batch release. Inspect placement, adhesion, visible color, and garment marking, then document first-article approval.
Can I reuse the workflow for a customer reorder?
Yes; duplicate the completed record, assign a new Order ID, and verify every requirement against the new request. Reapprove changed artwork or placement and retest changed garment-and-application combinations.
One last thing
A correctly printed transfer can still produce the wrong finished order. The failure can be the garment, placement, personalization, or packing assignment rather than the print itself.
Before releasing the batch, ask the operator to identify the approved artwork revision and match a finished garment to its order line. If that connection is unclear, repair the job record before pressing more pieces.


